从 0 到上线:用 Hugo + blowfish主题打造一个超快、超美、超自由的个人博客
#一生中要做三件浪漫的小事:
养一只猫,爱一个对的人,还有建一个自己的博客。
自建博客这件事,最好玩的是:
你说它长什么样,它就长什么样;你敲出哪行字,它就传遍全世界。
今天带你用 Hugo + GitHub Pages,打造一套又快又优雅的博客系统。
免费、无广告、安全、可玩性极高。
为什么选 Hugo?
#静态博客生成器百家争鸣,Hugo 为何加冕?
| 特性 | 描述 |
|---|
| 速度逆天 | 几毫秒就能生成整个站点,V8都追不上 |
| 纯静态部署 | 免费托管,CDN 静态缓存,更安 |
| Markdown + Git | 适合程序员的浪漫 |
安装Hugo
#若未安装scoop则先安装:
1.打开PowerShell
2.解除执行策略限制
复制执行:
1
| Set-ExecutionPolicy RemoteSigned -Scope CurrentUser
|
输入 A 继续

3.安装 Scoop
1
| Invoke-WebRequest -useb get.scoop.sh | Invoke-Expression
|
或者备用镜像(更快更稳):
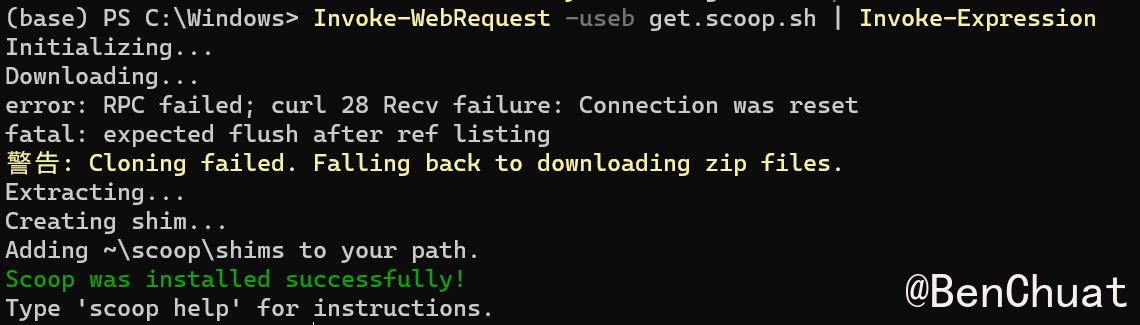
4.验证 Scoop
如果能显示版本则安装成功
如果提示未找到命令,请重启 PowerShell
安装hugo预编译
1
2
| scoop install hugo-extended git
hugo version
|

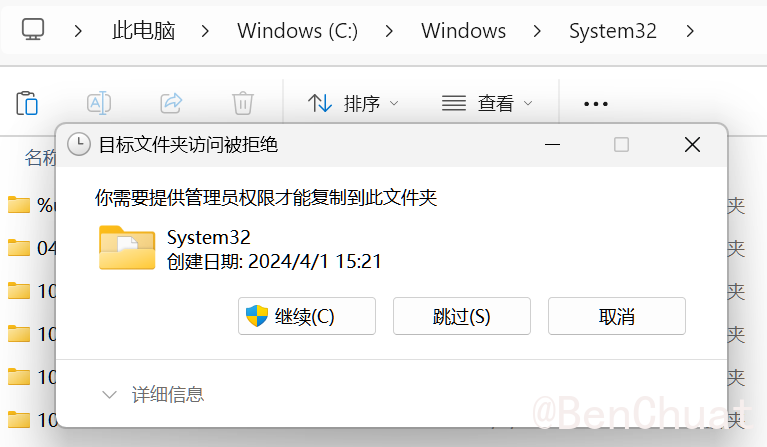
如果scoop安装不行就去github下载zip nunocoracao/blowfish:Hugo 的个人网站和博客主题,然后把解压出来的hugo.exe放到 C:\Windows\System32
Linux
#1
2
3
| sudo apt update
sudo apt install hugo git -y
hugo version
|
确保显示 extended
不然 CSS 会炸。
添加Blowfish
#安装Blowfish-Tools
#添加 Blowfish,我使用Blowfish-Tools,更多方法可以参考官方文档-> 安装和配置 · Blowfish
打开cmd或powershell安装
1
| npm i -g blowfish-tools
|
安装完可以运行以下命令打开工具:
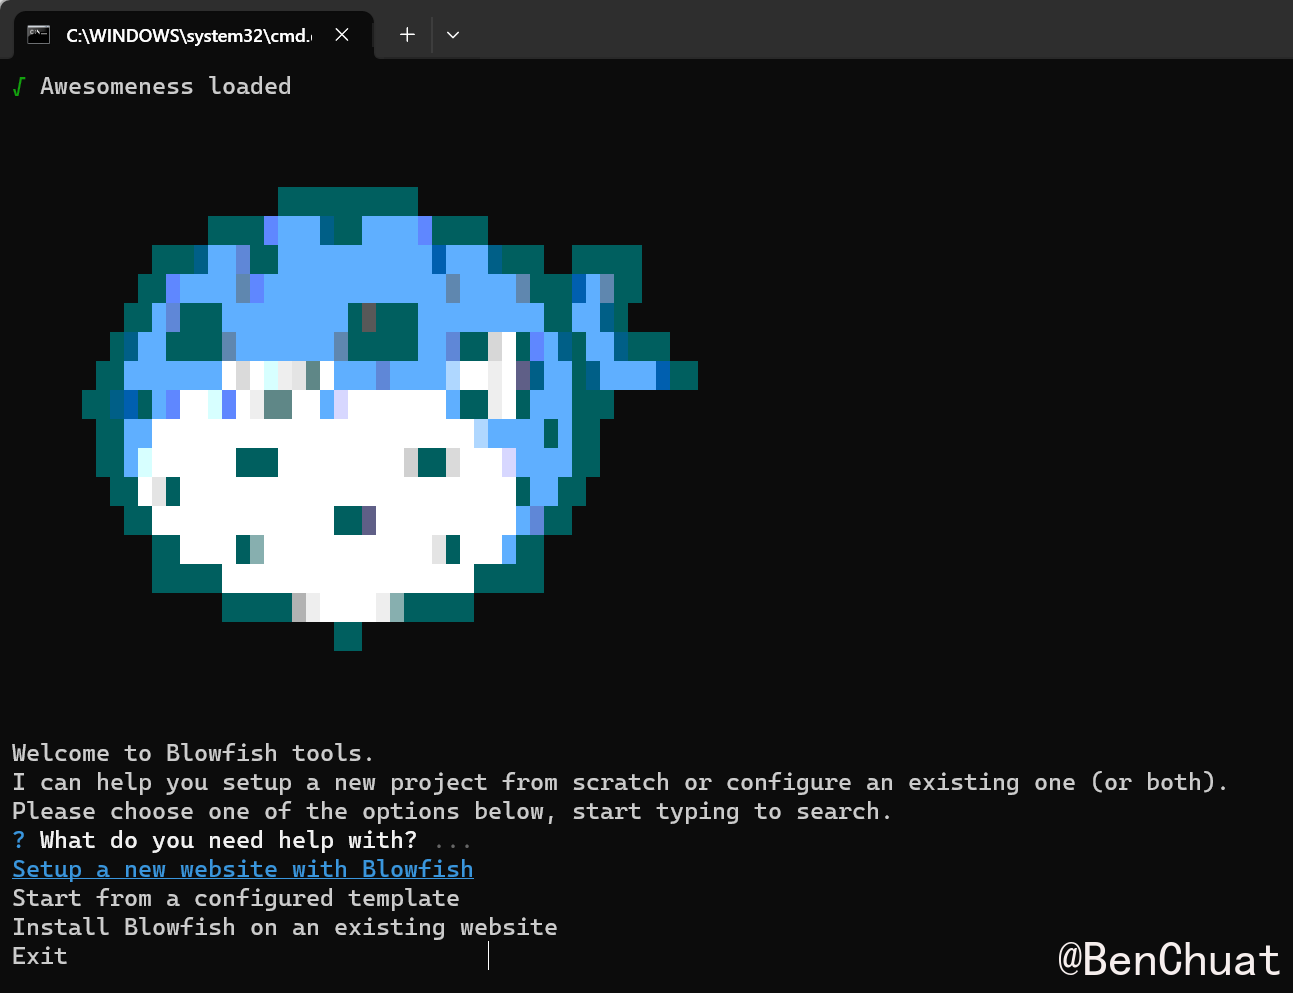
或运行下面命令,快速创建一个项目:
1
| blowfish-tools new mynewsite
|
打开了工具后,==方向键选择选项,回车键确认。==
现在选择setup a new website with blowfish,回车;
然后输入你要创建项目的路径(或写一个名字,会在目录下新建项目文件夹),回车。
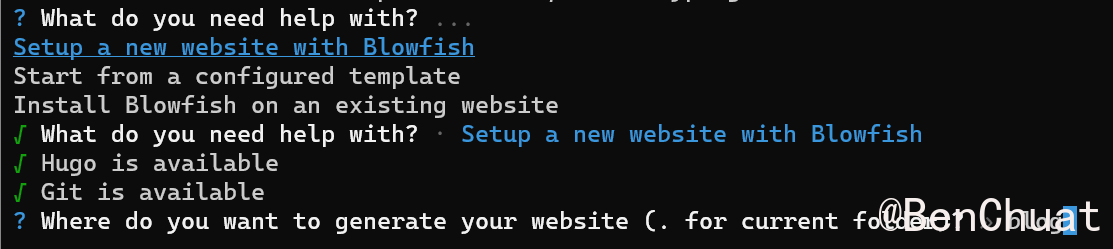
安装完之后就能进入配置菜单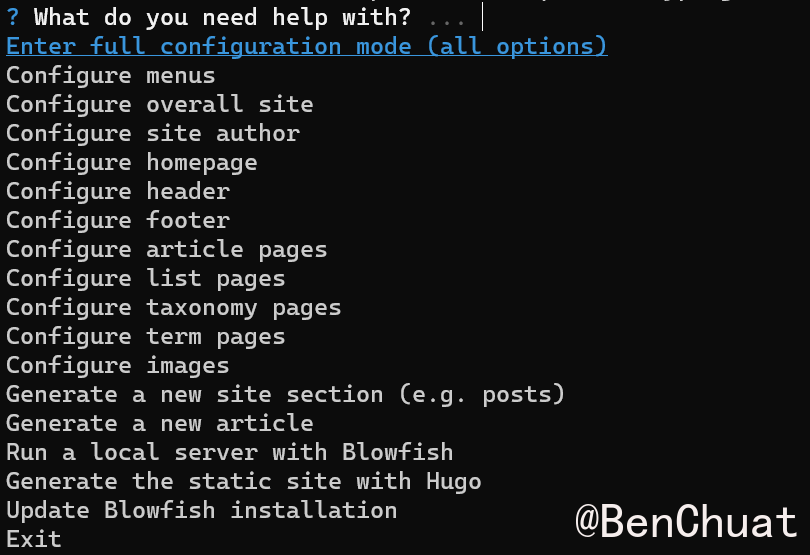
配置站点
#复制配置文件
#把./themes/blowfish/config/_default下的主题所有配置文件(.toml),复制到项目目录./config/_default下。
- 项目根目录下的
config/_default 会覆盖主题的默认配置。 - 当 Hugo 找不到对应配置时,会回退读取主题的版本。
后续我就直接在根目录下的 config/_default 下修改配置了
1
2
3
4
5
6
7
8
| hugo.toml ← 总控中心
│
└── config/_default/
├── languages.en.toml ← 定义语言结构
├── menus.en.toml ← 定义导航栏
├── markup.toml ← 控制 Markdown 渲染
├── module.toml ← 主题路径定义
└── params.toml ← Blowfish 个性配置(最重要)
|
手动配置文件
# 1
2
3
4
5
6
7
8
9
10
11
12
13
14
15
16
17
18
19
| [[main]]
name = "首页"
pageRef = "/"
weight = 1
[[main]]
name = "归档"
pageRef = "/archives/"
weight = 2
[[main]]
name = "标签"
pageRef = "/tags/"
weight = 3
[[main]]
name = "关于"
pageRef = "/about/"
weight = 4
|
1
2
3
| [zh-cn]
languageName = "中文"
weight = 1
|
1
2
3
4
5
| [author]
name = "MyName"
image = "profile.jpg"
headline = "Good Luck"
bio = "about me"
|
也可以用blowfish-tools进行配置
#在站点根目录下cmd,输入blowfish-tools,打开辅助工具
第一次使用建议跑一遍全向导,把必要配置一次写好:
- Configure overall site:站点名、语言、搜索、暗色模式
- Configure site author:作者名、头像、社交链接
- Configure menus:导航栏(首页/归档/标签/关于)
- Configure homepage:首页块布局与简介
- Configure header / footer:顶部/底部小部件
- Configure article pages:目录、阅读时长、代码复制按钮
- 预览:Run a local server with Blowfish
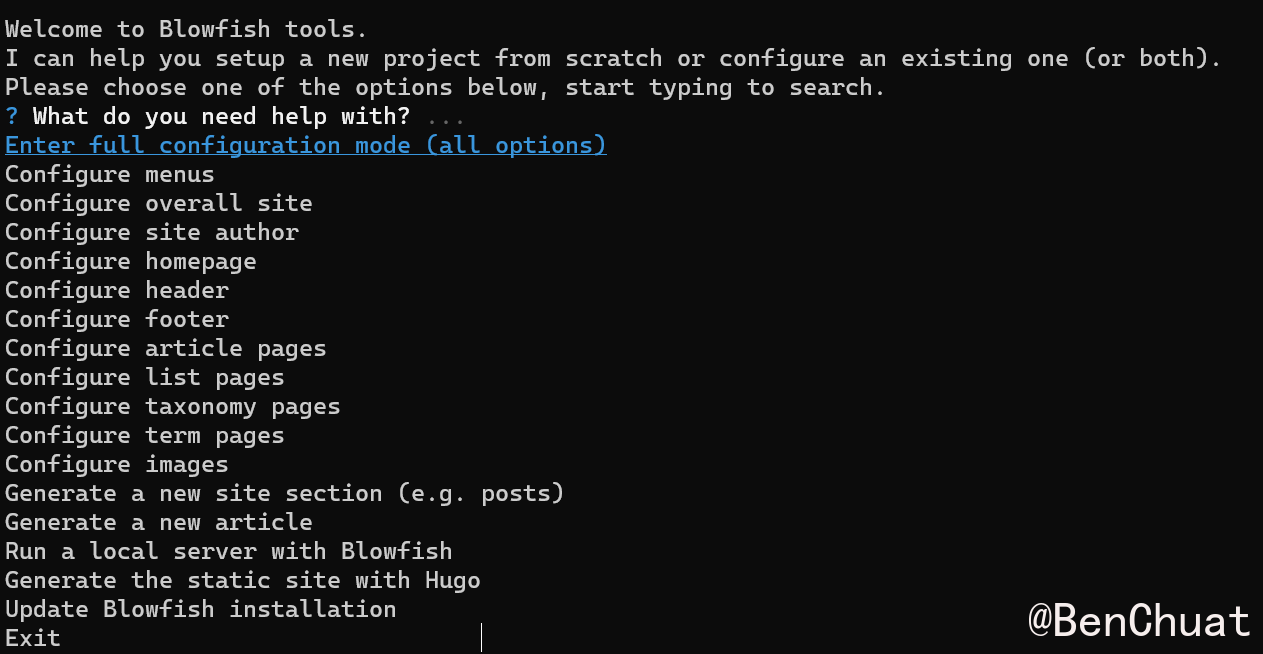
每次保存后都可以再跑一次预览看看效果。
配置中英文双站
#参考 -> 开启多语言支持 · BenChuat的记录本

配置归档页
#分别在中英目录content/zh-cn/archives、 content/en/archives下创建 _index.md,指定使用列表布局,并按年分组显示摘要。
content/zh-cn/archives/_index.md
1
2
3
4
5
6
7
8
9
10
11
12
13
| ---
title: "归档"
date: 2025-01-01
layout: "list"
groupByYear: true
showSummary: true
---
|
content/en/archives/_index.md
1
2
3
4
5
6
7
8
9
10
11
12
13
| ---
title: "Archive"
date: 2025-01-01
layout: "list"
groupByYear: true
showSummary: true
---
|
说明:
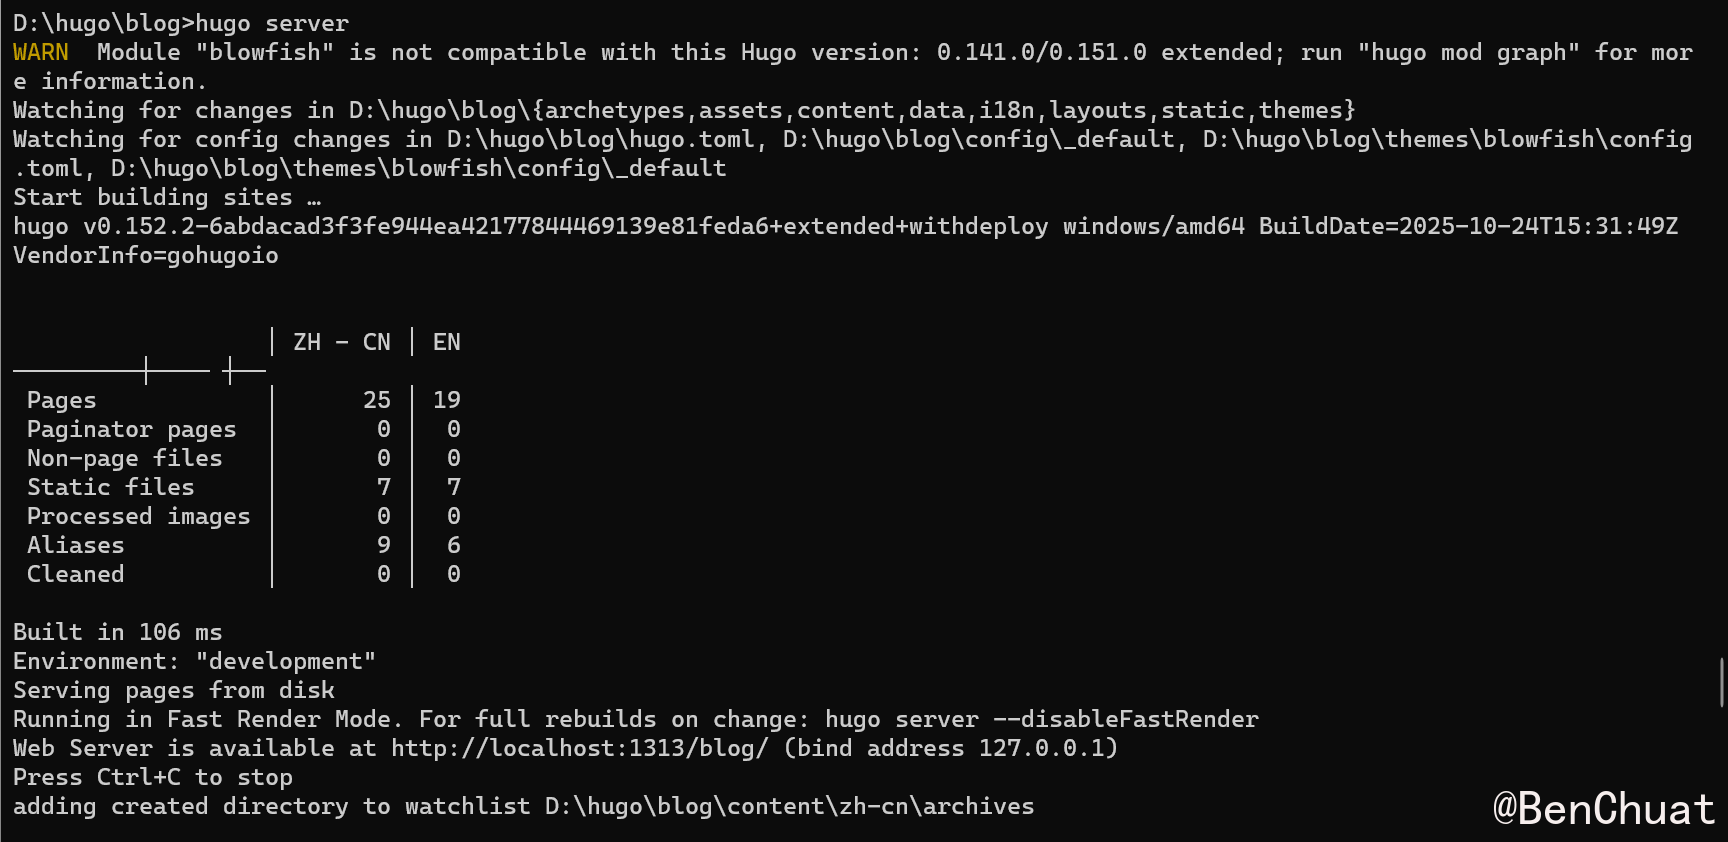
现在可以在hugo项目目录下输入hugo server或通过前面提到的blowfish-tools来启动服务,在本机上预览。
在GitHub上托管
#在 GitHub 上创建仓库
#打开 GitHub → 点击右上角 “➕ → New repository”
仓库名称填写为:
1
| [你的GitHub用户名].github.io
|
例如我叫 BenChuat,那仓库名应为:
仓库设置为 Public,勾选 “Add a README file”,点击 Create repository。
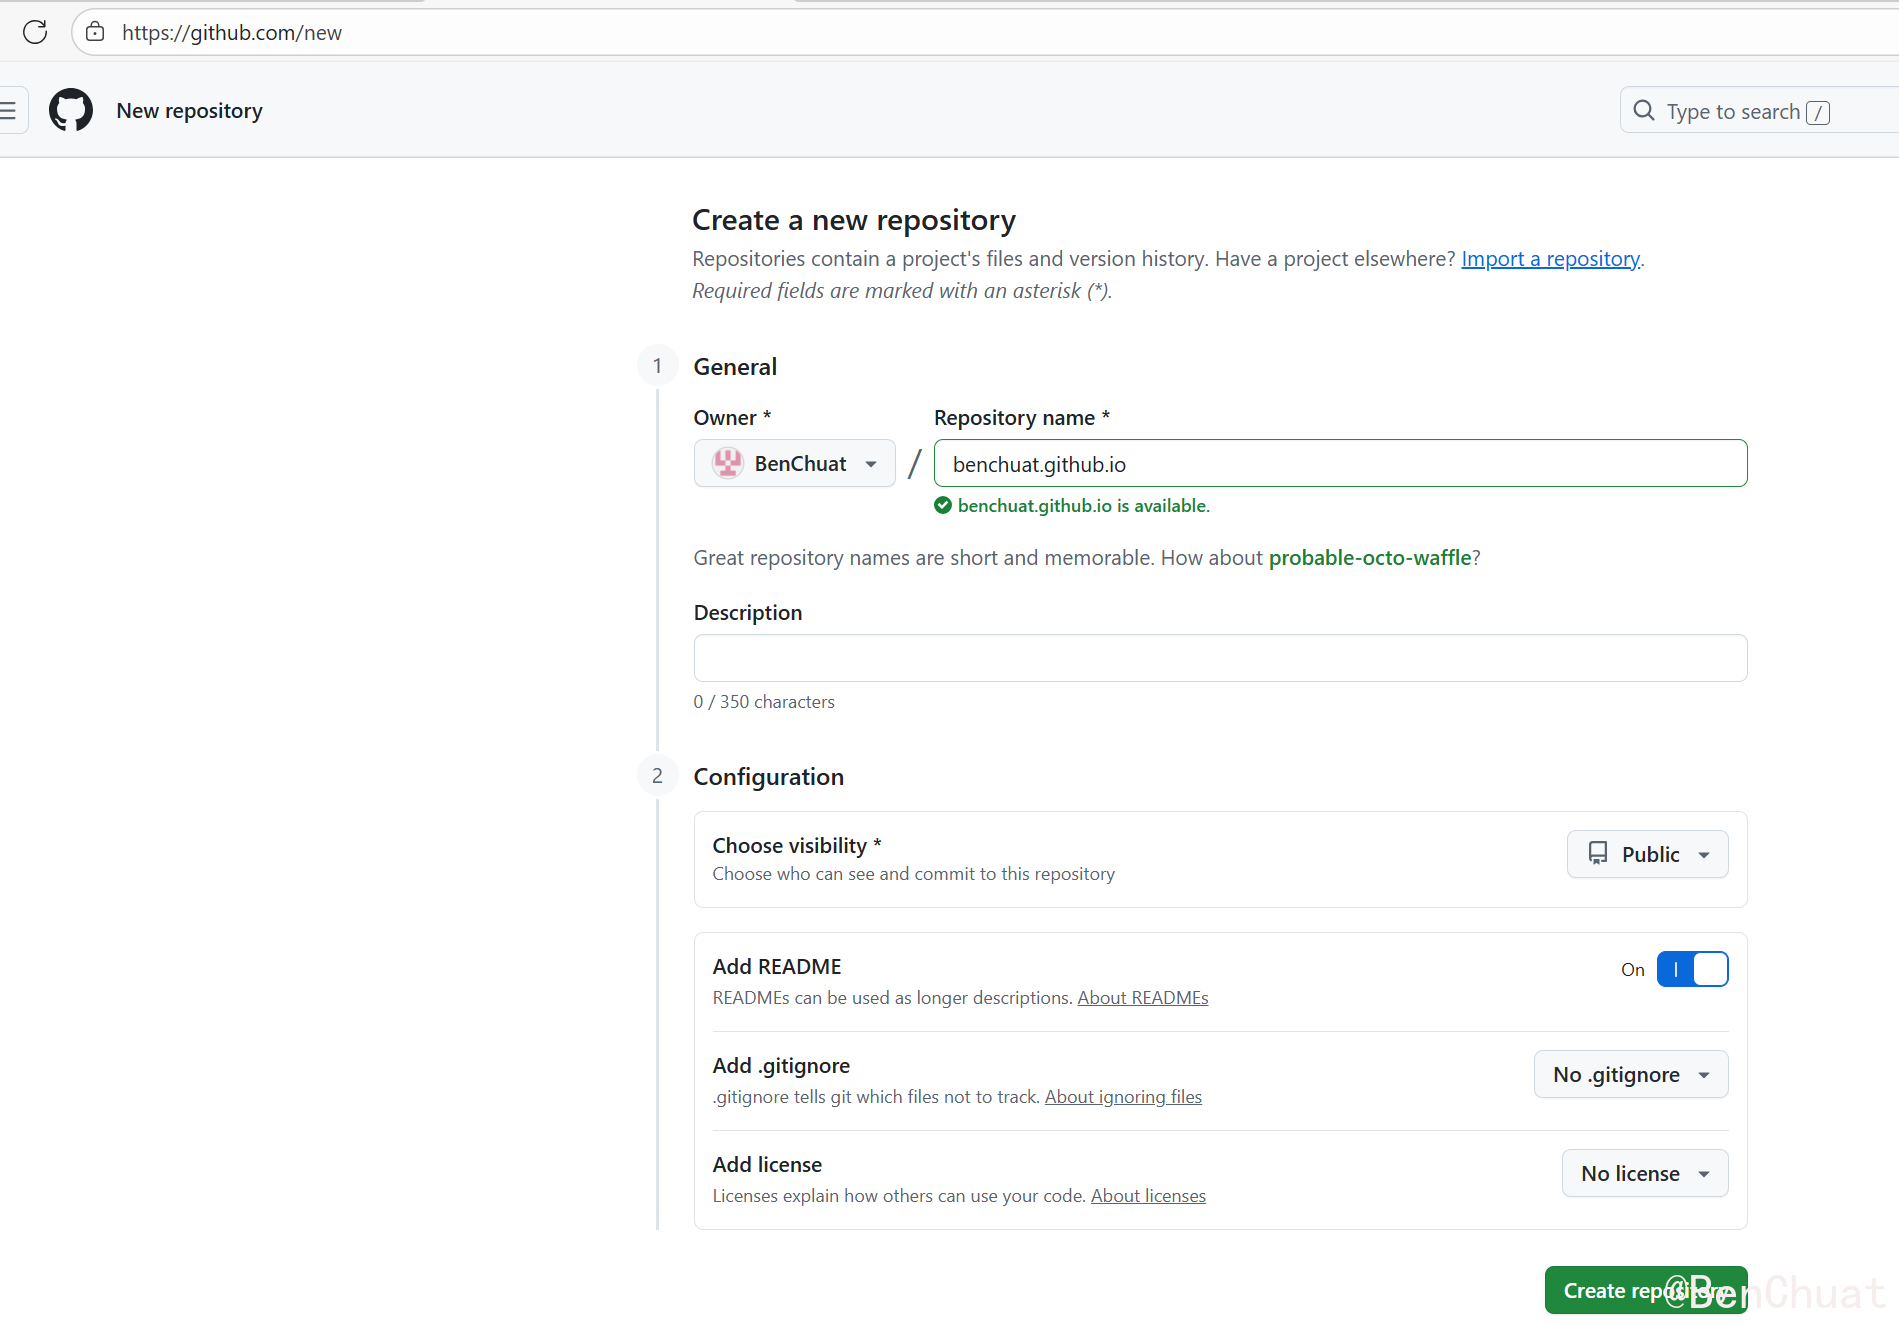
至此,个人网页仓库就创建好了。
本地初始化 Git 并连接远程仓库
#进入 Hugo 博客项目根目录(不是 public 文件夹):
1
2
3
4
5
6
7
8
9
10
11
12
| cd D:\hugo\blog
git init
git remote add origin https://github.com/benchuat/benchuat.github.io.git
git remote set-url origin https://github.com/benchuat/benchuat.github.io.git
# 如是修改地址则把add改为set-url
# git remote set-url origin https://github.com/newuser/newrepo.git
# 查看远程仓库地址
# git remote -v
git add .
git commit -m "Init Hugo source"
git branch -M main
git push -u origin main
|
这时 GitHub 上就会有你的 Hugo 源代码。
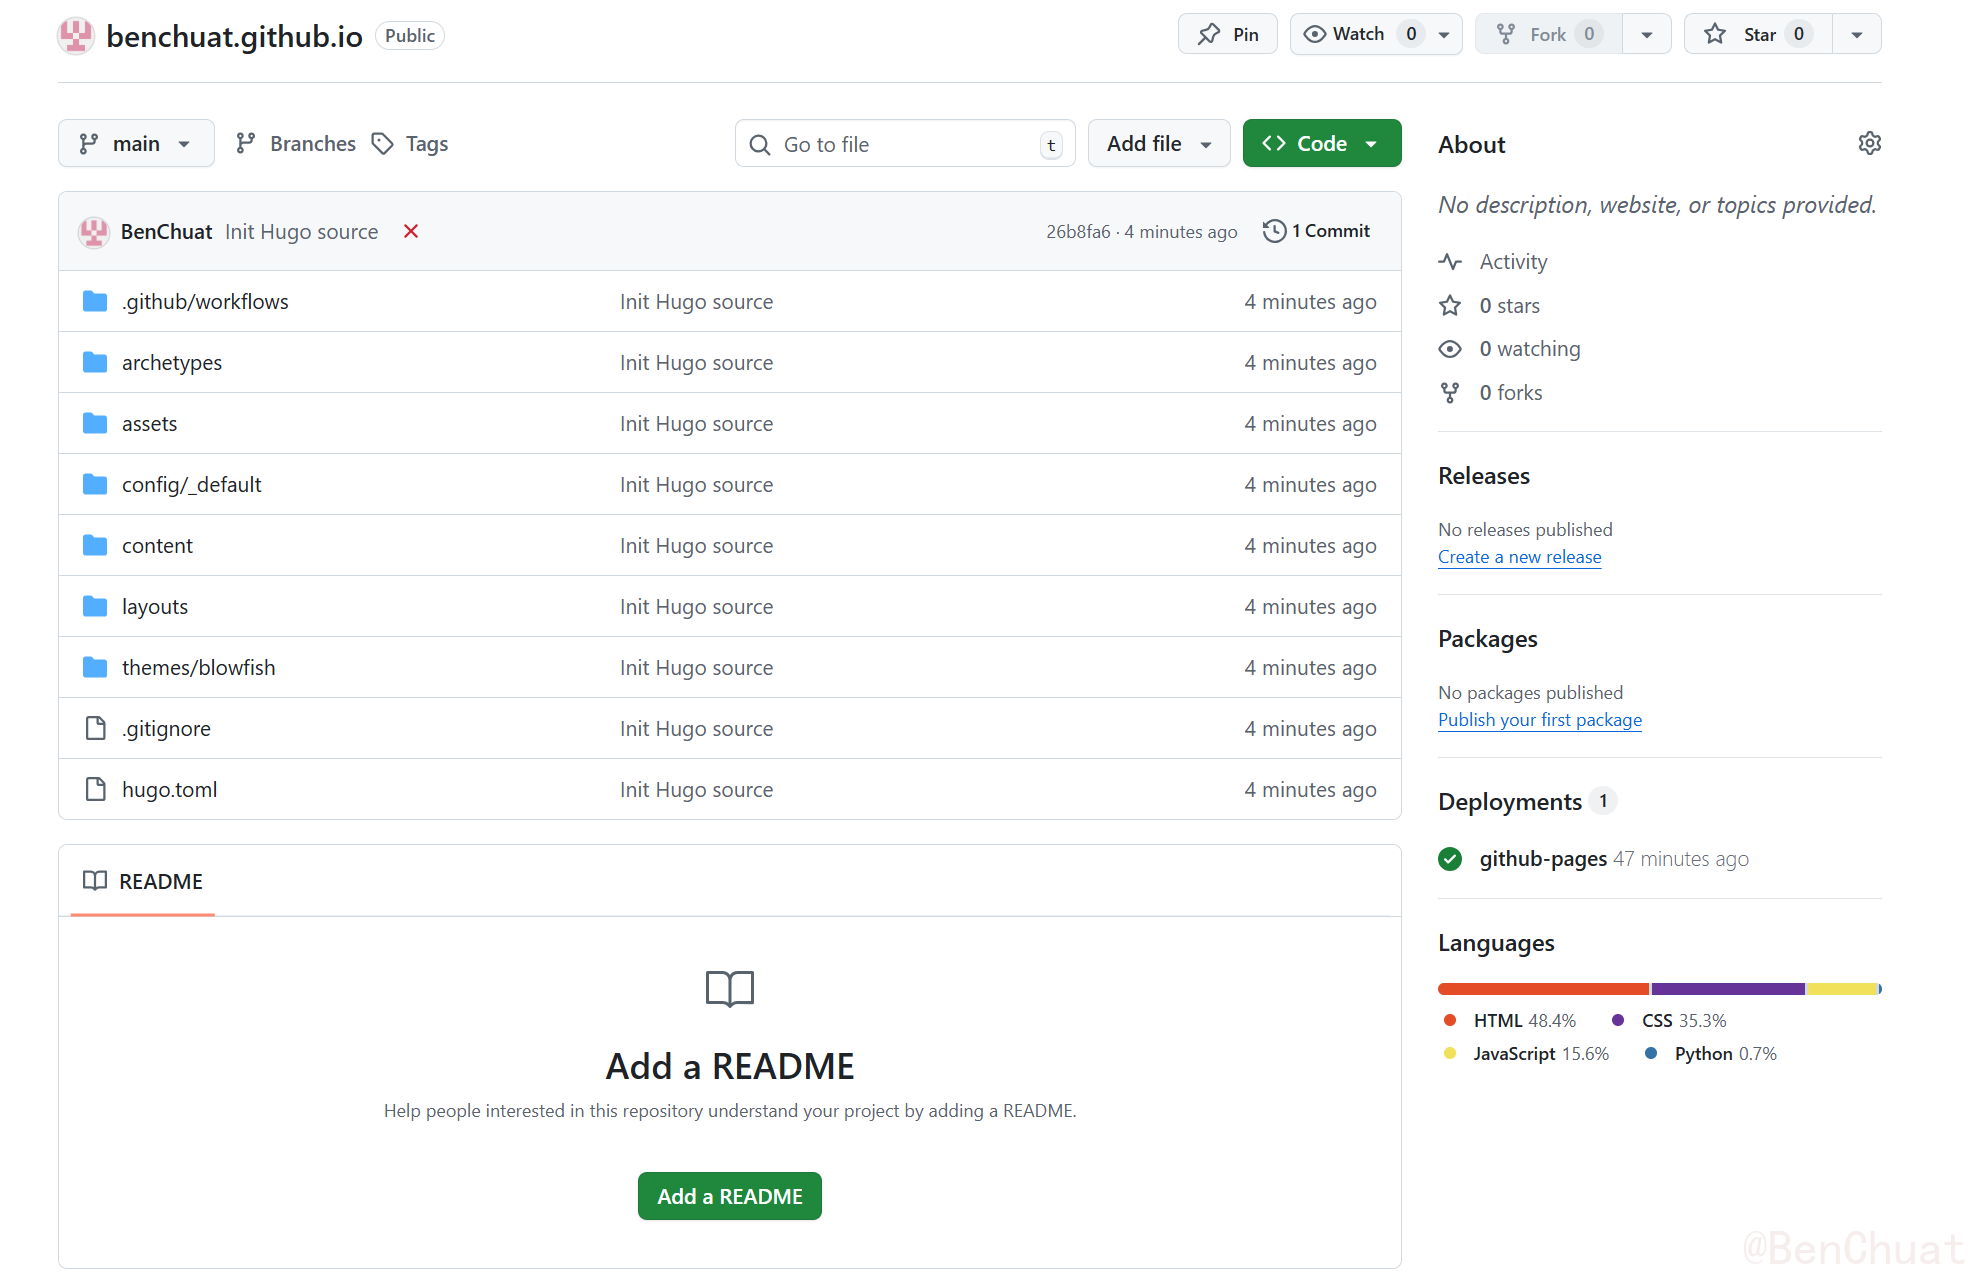
配置 GitHub Actions 自动部署
#这一部分是最核心的:让 GitHub 自动执行 hugo 命令,并把生成的静态网页部署到 Pages。
创建 Actions 配置文件
#在项目根目录下新建文件夹:
在里面新建一个文件:
内容如下:
 1
 2
 3
 4
 5
 6
 7
 8
 9
10
11
12
13
14
15
16
17
18
19
20
21
22
23
24
25
26
27
28
29
30
31
32
33
34
35
36
37
38
39
40
41
42
43
44
45
46
47
48
49
50
51
52
53
54
55
56
57
58
59
60
61
62
63
64
65
66
67
68
69
70
71
72
73
74
75
76
77
78
| name: Deploy Hugo to GitHub Pages
on:
push:
branches: [ main ]
permissions:
contents: read
pages: write
id-token: write
concurrency:
group: "pages"
cancel-in-progress: true
jobs:
build:
runs-on: ubuntu-latest
steps:
- name: Checkout
uses: actions/checkout@v4
with:
submodules: true
fetch-depth: 0
- name: Setup Hugo
uses: peaceiris/actions-hugo@v3
with:
hugo-version: '0.152.2' # 用你本地的版本
extended: true
- name: Build
run: hugo --minify
# 补齐 *.assets 到 public
- name: Copy Typora .assets folders into public (fixed with subdir)
run: |
set -eu
shopt -s globstar nullglob
for md in content/**/*.md; do
base="${md%.md}" # content/zh-cn/posts/test-post
assets="${base}.assets" # content/zh-cn/posts/test-post.assets
[ -d "$assets" ] || continue
rel="${base#content/}" # zh-cn/posts/test-post
lang="${rel%%/*}" # zh-cn or en
rest="${rel#*/}" # posts/test-post (或更深的层级)
name="${rest##*/}" # test-post
sectionPath="${rest%/*}" # posts
if [ "$lang" = "zh-cn" ]; then
# 默认语言放根目录:/posts/<name>/<name>.assets
out="public/${sectionPath}/${name}/${name}.assets"
else
# 非默认语言:/en/posts/<name>/<name>.assets
out="public/${lang}/${sectionPath}/${name}/${name}.assets"
fi
mkdir -p "$out"
cp -R "$assets"/. "$out/"
echo "Copied: $assets -> $out"
done
- name: Upload artifact
uses: actions/upload-pages-artifact@v3
with:
path: ./public
deploy:
needs: build
runs-on: ubuntu-latest
environment:
name: github-pages
url: ${{ steps.deployment.outputs.page_url }}
steps:
- id: deployment
uses: actions/deploy-pages@v4
|
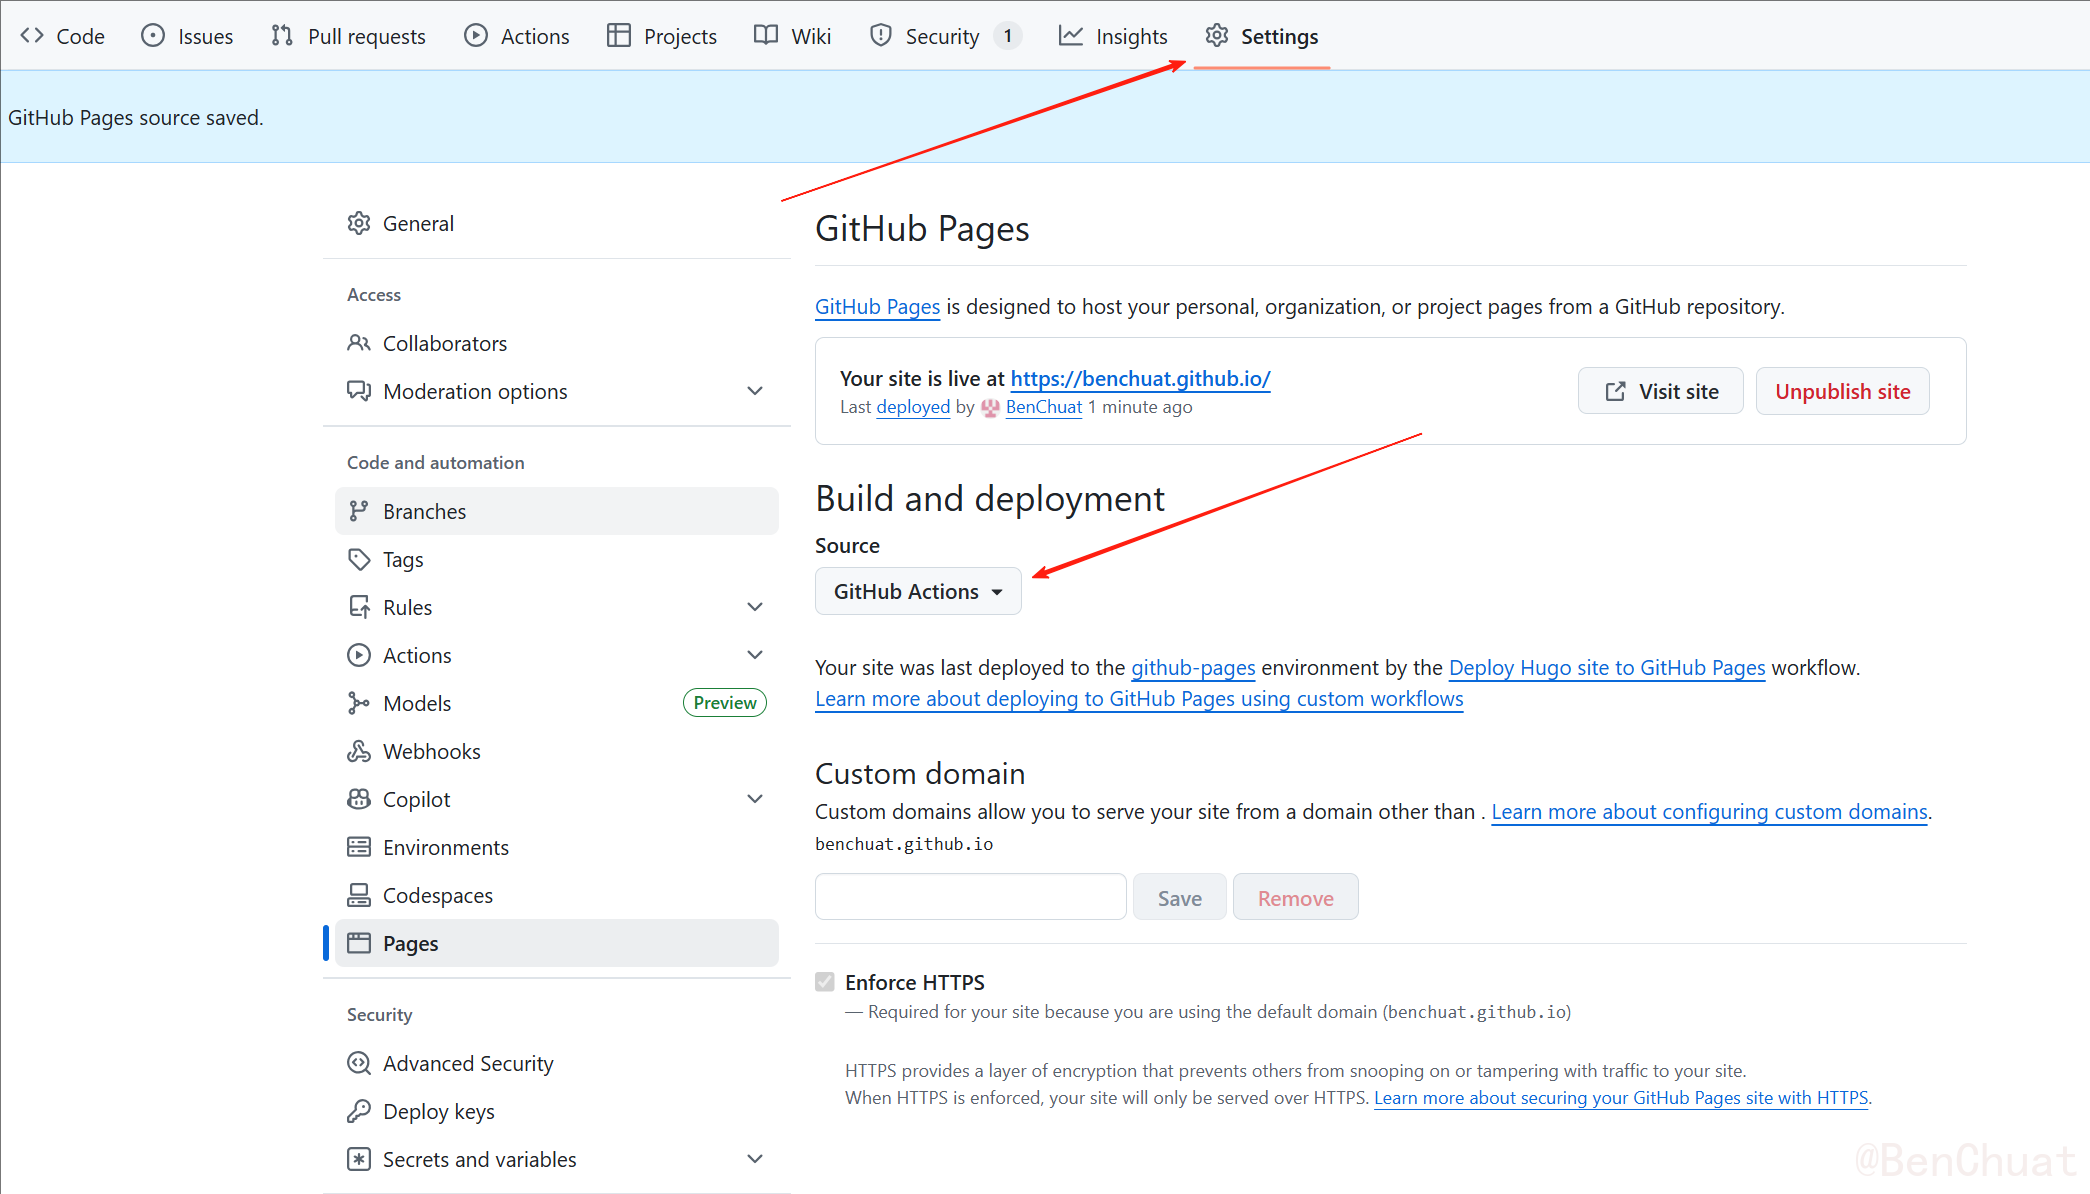
在 GitHub 启用 Pages
#进入仓库 → 点击上方 Settings → 左侧栏选择 Pages。
在 Build and Deployment 部分选择:
- Source: GitHub Actions
- 不需要选分支,因为 Actions 会自动发布。
GitHub 会自动识别 deploy.yml 并运行。
==推送到github上后记得修改baseURL!!!==
把项目根路径下的hugo.toml文件里的baseURL = http://localhost:1313/blog/ 改为你的github路径
baseURL = "http://[你的GitHub用户名].github.io/"
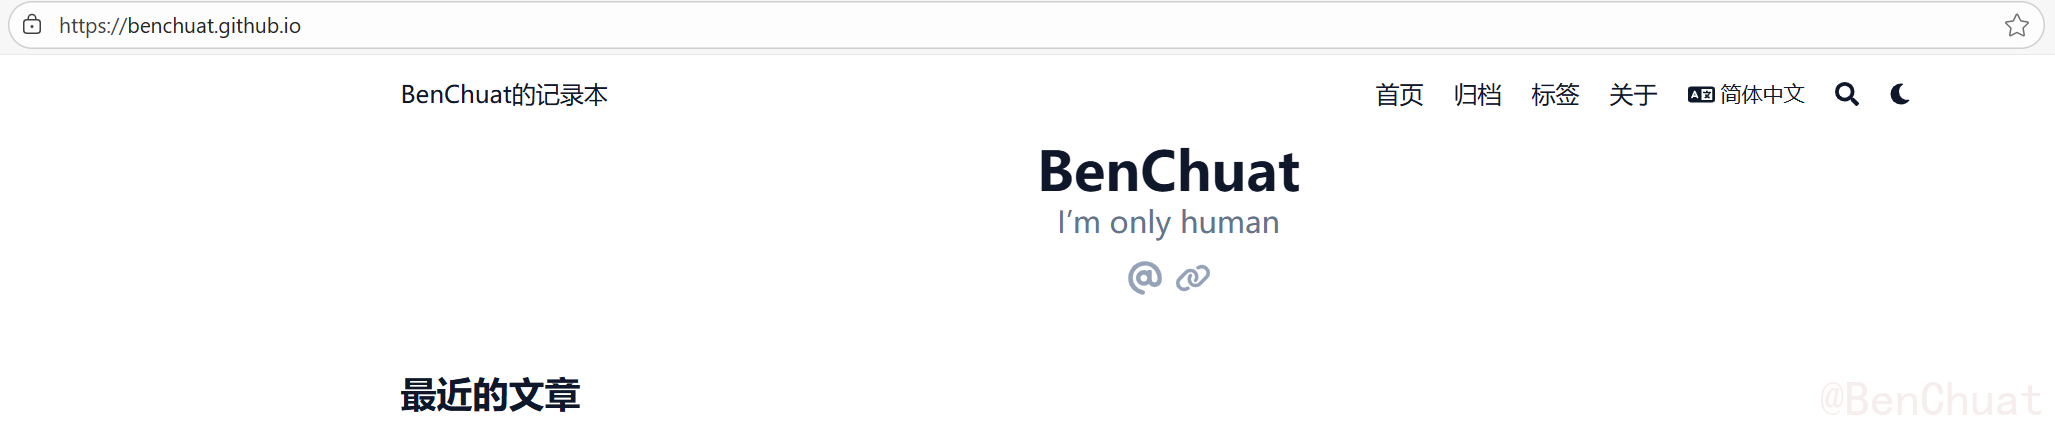
这时你就能用github托管的网址url访问了,我的网页 -> BenChuat的记录本
测试自动部署
#现在只需要执行:
1
2
3
| git add .
git commit -m "update site"
git push
|
每当你推送到 main 分支时,GitHub Actions 会自动:
- 安装 Hugo
- 运行
hugo --minify - 生成静态文件
- 自动发布到 GitHub Pages
大约 1~2 分钟后,访问:
1
| https://benchuat.github.io/
|
你的博客就会自动更新上线啦!🎉
目录结构建议
#推荐你的项目结构如下:
1
2
3
4
5
6
7
8
9
10
11
12
13
14
15
16
17
18
19
20
21
22
23
24
25
26
27
28
29
30
31
32
33
34
35
36
37
38
39
40
41
42
43
44
45
46
47
48
49
50
51
52
53
54
55
56
57
58
59
60
61
62
63
64
65
66
67
68
69
70
71
72
73
74
75
76
77
78
79
80
81
82
83
84
| D:\hugo\blog\
│
├── archetypes/ # 新文章模板(例如默认 front matter)
│ └── default.md
│
├── assets/ # 资源文件(SCSS、JS、图片等)
│
├── content/ # 内容目录(你的博客文章按语言分)
│ ├── en/ # 英文站内容
│ │ ├── posts/ # 英文文章目录
│ │ │ ├── hello-hugo.md
│ │ │ └── test-post.md
│ │ ├── about/ # 英文 About 页面
│ │ │ └── _index.md
│ │ └── _index.md # 英文首页元数据
│ │
│ ├── zh-cn/ # 中文站内容
│ │ ├── posts/ # 中文文章目录
│ │ │ ├── hello-hugo.md
│ │ │ └── test-post.md
│ │ ├── about/ # 中文 About 页面
│ │ │ └── _index.md
│ │ └── _index.md # 中文首页元数据
│ │
│ └── _index.md # 根 index(可选)
│
├── data/ # 可选的数据文件 (YAML/JSON/TOML)
│
├── i18n/ # 国际化翻译文件
│ ├── en.yaml
│ └── zh-cn.yaml
│
├── layouts/ # 自定义页面模板(若覆盖主题内容)
│
├── public/ # Hugo 生成的静态网站(自动生成,不需提交)
│ ├── index.html
│ ├── en/
│ ├── zh-cn/
│ └── ...
│
├── static/ # 静态资源(不会被 Hugo 处理,直接复制到 public/)
│ ├── images/
│ ├── favicon.ico
│ └── ...
│
├── themes/ # 主题目录(如 Blowfish)
│ └── blowfish/
│ ├── archetypes/
│ ├── assets/
│ ├── layouts/
│ ├── i18n/
│ ├── static/
│ ├── config.toml
│ └── theme.toml
│
├── .github/ # GitHub Actions 自动部署配置
│ └── workflows/
│ └── deploy.yml # 自动构建 & 部署 Hugo 到 GitHub Pages
│
├── config/ # Hugo 多语言配置目录
│ └── _default/
│ ├── hugo.toml # 全局配置(baseURL、多语言启用等)
│ ├── languages.en.toml # 英文站配置
│ ├── languages.zh-cn.toml # 中文站配置
│ ├── params.toml # 全局参数(首页布局、显示文章数量等)
│ ├── menus.en.toml # 英文导航菜单
│ ├── menus.zh-cn.toml # 中文导航菜单
│ ├── module.toml # 模块导入配置(主题)
│ └── markup.toml # Markdown 渲染选项
│
├── resources/ # Hugo 编译缓存(自动生成,可忽略)
│
├── .gitignore # Git 忽略规则
│ ├── /public/
│ ├── /resources/
│ ├── .DS_Store
│ ├── *.log
│
├── go.mod # Hugo 模块依赖(记录主题等模块)
├── go.sum
│
├── hugo.toml # 根配置文件(重定向到 config/_default)
│
└── README.md # 项目说明文件
|
⚠️ 不需要再上传 public/ 目录!
它会在构建时自动生成。
可以在 .gitignore 里添加:
